![Related Grey - [rG]](http://images.squarespace-cdn.com/content/v1/63b743d4ba766470b7514aeb/af97fe1b-98b2-466d-80a1-5109274adabe/rG_yl.png?format=1500w)
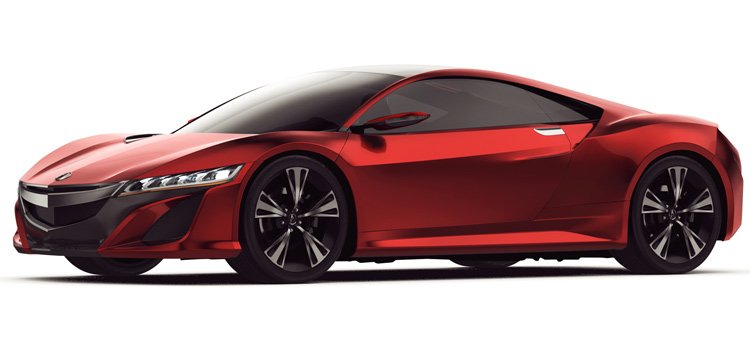
PROJECT NSX

BuRoad is the prototypical California driving road. Rough pavement, lots of corners and elevation changes, well engineered and highly predictable. We wanted to capture the feeling of a late afternoon run through the canyon, with the liquid light of the long-set sun making the paint drip in color. StudioHDR brought the front-end design out with a subtlety, especially in the blacks, that couldn’t have been done with fill cards or lights on a real car.

Seeing the Catering location for the first time it was a foggy evening and the location's light seemed to be coming from everywhere. Getting a sense of mystery while still feeling comfortable is a delicate balance. Zay’s idea to have the car nose into spot. Brilliant. We treated this as if it were a night scene and we were actually photographing it. Great exercise and fun.

Carmel was a perfect dawn. The weather was supposed to be off, with patchy rain all day. Where I come from, we call that nice. Being on the edge of weather allows for pools of light against silhouettes of darkness, splashes of color against muted frames, and the occasional breakfast without a capture. Not that day.
PROJECT NSX Overview
The location portion of the production was much as if a car were being photographed, less any lighting the car may need. Decisions as to location selection, lensing, camera position, action, time of day, etc., were all considered and accounted for. Talent? Not so much.
In-computer pre-visualization of the car is important. As no actual car exists, Isaiah pulls up the car model on his computer and selects different lenses and positions to discuss what looks good on the car. Knowing in advance of location selection, for instance, that a pure front ¾ view looks great with a 37mm lens about 5 feet off the ground (and you get 45 degrees into scene from the pure ¾) is a wonderful thing.

On location setup can include dialing in the camera to the location with the use of a render of the car overlayed onto live scene images to further visualize and align elements. Still, generally you shoot the location where you think it’s right, and go up a bit and down a bit and shoot those, too, and other angles, because you’re there and it is the happy accidents, the found elements, that sometimes make wonderful.

All of that is just the beginning, because then lighting in StudioHDR takes place, which is an awesomeness that can shared with two words: translucent lighting. Any light you can dream of, anywhere in or out of the scene, to light the car with. A box, a spot, a flat, a blimp, whatever, presto, it’s there. Better – and this is where awesome comes in – those lights can be translucent, illuminating gently while still allowing the natural scene to come through with a variable degree of transparency in both color and quantity of light and reflection. Never has a light been more perfectly supplemental.And we should be done. We could be done, if not for the combined glories of AfterEffects and PhotoShop. Used gently, like aging whisky in oak not too much please but enough that I know you’re there, the nuances of color and the sensibilities of light are brought to compatibility, layered in adjustments of hue and balance, levels and curves, with masks and feathers. And yes, still talking about editing!

Workflow Example: HDR Sphere File for 3D Model Lighting in PTGui Pro
We use PTGui Pro to create the spherical .hdr files used as the starting lighting point when combining 3D cars with photographic background plates. These High Dynamic Range “photographs” carry much more information than typical photos. In essence, they carry a wide range of exposures so that we can decide how to make use of them later. When brought into the various lighting and rendering engines the full range of color and light is available, adjustable, and infinitely supplement-able.
Here’s a walk through of the process:

Opening a new file select “True HDR” “Link Bracketed Images” and “Load Images”. Once your images are loaded, click on “Advanced” then “Align Images” and let it go. PTGui Pro is very good at creating all sorts of panoramas, but we’re only dealing with a sphere here, and it was shot correctly, so let PTGui figure out the details.
You shouldn’t need to edit your images, but if you need to delete any you’ll use the “Source Images” tab. The “Lens Settings” and “Panorama” tabs are fun to take a look at, but not much used. Don’t even think of touching anything in “Crop” or “Image Parameters”.

When the images are aligned they are revealed in Panorama Editor. Toggling it to Edit mode as I have here (three squares icon at left in toolbar) lets you select images and see where they are. If there is no detail for control points to have been generated you’ll have to place the images within the panorama yourself. This is done two ways. For broad expanses of sky without detail, approximate the images placement by comparing to others and click/drag them into similar position. The blend function of the software will make them fit. Click around and see if you have any errant image placements. For any misaligned images that have overlapping detail, see “Control Points” below.

The “Control Points” tab will become your friend. Note that you only align control points between “On” exposures. The over- and under-exposures are aligned with them. (Remember, you told it to “Link Bracketed Images” when opening the file.) You may need to delete control points that have too great a “Distance” from their expected position. Anything more than 10 pixels off should be tossed. You’re viewing two overlapping photos side by side here, find the same points in each and click click, you’ve got a control point. As few as three points between images can do a decent stitch, but five to seven is safer.
The need to use this panel has much to do with the subject matter in the scene. Any motion such as wind in plants or a person walking through can throw off the software’s automatic alignment functions. Use Panorama Editor to define the images that need alignment then come to Control Points to align them manually. Images overlap on each side and on top and bottom, i.e., one image may share control points with up to four others, and all may need to be adjusted.
The good news is that most of the time PTGui creates a solid stitch and little or no futzing with control points is needed.

Once you’ve changed control points, you need to optimize to have the images re-aligned. Important here is the selection of the Anchor Image. The default is Image 0 and that is often the first image captured, a pointed up at the sky, not much detail image. Better to choose one looking fairly horizontal and capturing a good bit of detail.

Finally, to HDR. Click on “Enable HDR stitching” “True HDR” and “Tone Map Settings”. Wait for it…

It may take a while for the image to be processed and open in the “Tone Mapping” window. Here’s where you get to dial in the relative exposure represented in the final .hdr file. Remember – it isn’t about making this a cool picture, it’s about getting the photo-metric information that the lighting model needs. The +2 on brightness shown here is a bit much but the .hdr file contains a greater range than shown, so let the highlights blow out a little bit. They can be adjusted in the 3D lighting program. Depending on the scene Compression may or may not be needed. Radius should be left alone, and Saturation and Contrast used with extreme prejudice.

Just a screen grab of the upper section of the “Project Settings” tab to show the settings used. Once set, you won’t come to this tab much but it is important to turn off “Perform automatic exposure and color adjustment”.

When creating your panorama, select the size and file types you’ll need, where you want them saved to, and click on “Create Panorama”. Avoid the advanced settings. Processing your files may take a while, but a decent progress bar gives an indication of what to expect. You did set up a scratch disk in preferences, yo?
Camera & Capture Equipment
5D Mark II
17-40mm f/4L at 17mm and f/8
Shutter used to bracket exposure
Manual focus and exposure
Medium size high quality jpeg
4-stop bracket
Color temp set to match background captures via K rating